Jim Kibler shares an October Update on the Woodsrunner kit
In this video, Jim shares some side by side comparisons between his bench copy of the original Woodsrunner rifle and the Kibler Woodsrunner Kits, as well as some up close details of the machining done for these kits.
This update video really tells us why the Woodsrunner is taking a while to be released, there are a lot of big changes with this kit.
When first announced, some saw the Kibler Woodsrunner being too similar to the Kibler Colonial, but as we see more details from the Kibler shop about the Woodsrunner, it’s clear the kits are very different and provide a nice variation for the kit builder.
As the story goes, Jim says the kit version of the woodsrunner could represent a rifle made 5 years after the first woodsrunner. Styles change through time and Jim has taken that into account when designing the kit.
As Jim showcased some of the details of the kit version of the stock, which is machined in a new 5 axis CNC machine, he gives us some detailed views of the patchbox of the rifle.
The patchbox on the rifle is similar to the original Woodsrunner, but different when compared to the other Kibler patchboxes as seen on the Kibler Colonial. The Kibler Woodsrunner stock features a round bottomed patchbox and a rounded dovetail.
As noted in past updates, the new machines will allow for improved stock finish for your kit. This of course depends on the individual piece of wood used so there may be some variation, but overall the quality of the stock finish looks to be improving with this new equipment.
As seen below, the woodsrunner stock has almost no lateral machining marks in the wood. It should be noted though, that even in the kit I purchased, the marks were easy to clean with sandpaper or a scraper for a beautiful finish in less than an hour.

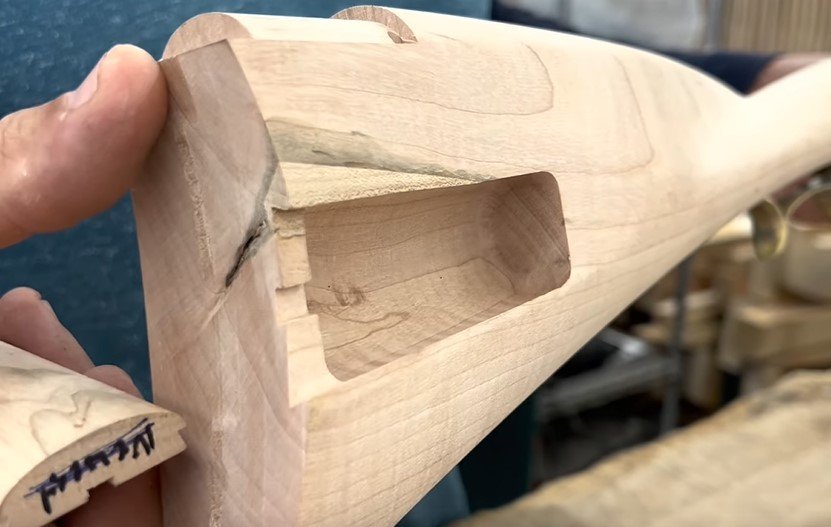
As the video goes, Jim details some of the precise fitting of hardware parts into the wood stock. He first demonstrates the drop in fit of the lock and then goes through some other details.
Jim details how the barrels will now be drop in as well. The underlugs are machined into the barrel, the holes for the barrel pins are predrilled, and the slots for the underlugs are cut into the stock. This is yet another step in the Kibler mission to make assembling a muzzleloader as simple as they can for builders of all skill levels.
The nose caps for the Kibler Woodsrunner kits will also be machined to fit the stock and barrel as precise as possible. The nose cap is ALSO pre drilled to fit the cap to the stock.

The machined nose cap sliding on with ease

The machined nose cap set in place

The Woodsrunner Nose cap is held on with two screws set inside the barrel channel. The excess screw length is then filed off the exterior of the cap during the clean up process.
The last major update on how these parts are produced is with the buttplate. For decades buttplates have been case parts offered at a variety of qualities. Some are rough, some are just about done when purchased. What Jim is doing with the Woodsrunner butt plate is a step further.
The Woodsrunner Buttplate starts as a rough sand casting, and is then machined to final form. The goal, like all of these parts from Kibler is to have an exact fit out of the box. No wood removal, no tweaking or twisting needed.
Kibler notes that the amount of machining does increase costs and that they are continuing to find a balance between quality of parts and cost of parts.
As Jim goes through the improvements to the kit, I can’t help but think back to my days of playing with an “Erector Set” on my bedroom floor, fitting parts and building contraptions. Jim and the Kibler team are really bringing muzzleloaders to that level, a level in which anyone interested in building a muzzleloader and shooting a muzzleloader can get started and have an enjoyable first experience.